Configuring Veeam Availability for Nutanix AHV

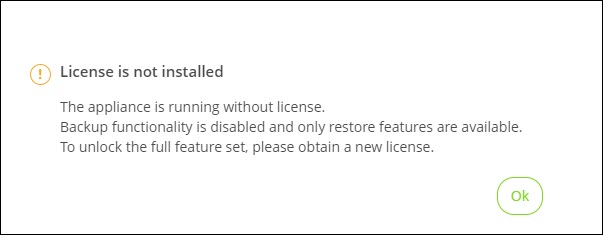
Step 1: Log in to the proxy appliance web. The first message you will receive is regarding licensing. Click Ok.

2019-10-01_15-27-29

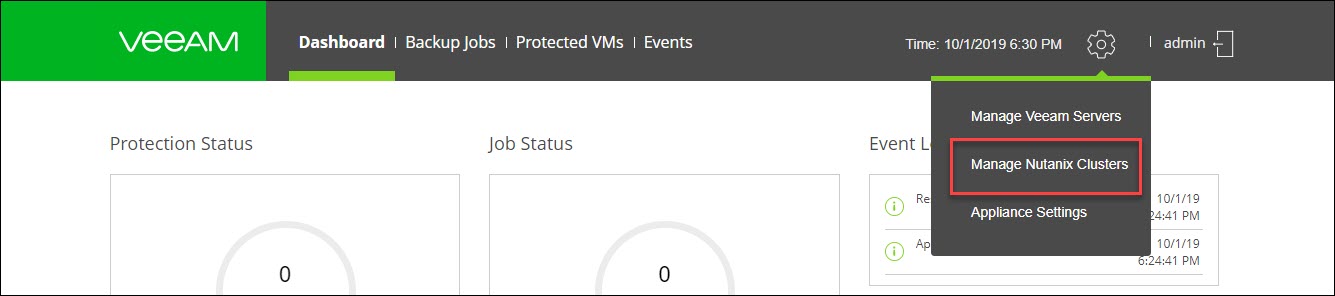
Step 2: Click the gear icon and select Manage Nutanix Clusters.

2019-10-01_15-28-40

Step 3: Click the Add.

2019-10-01_15-30-24

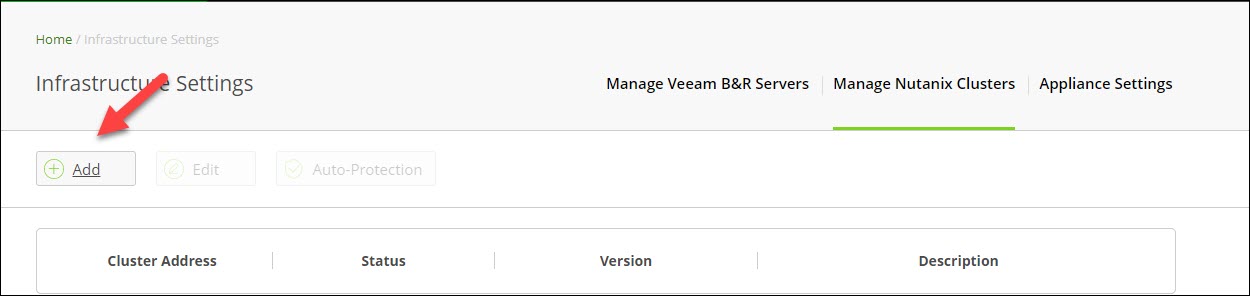
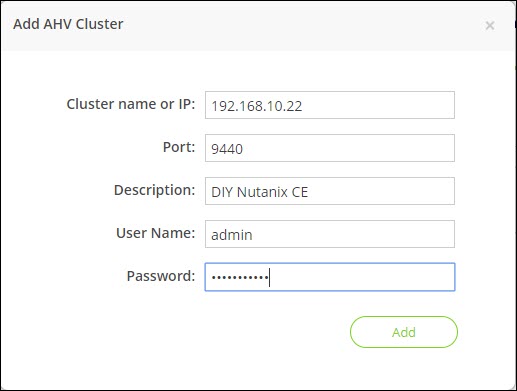
Step 4: Add the Nutanix cluster details. Click Add.

2019-10-01_16-07-33

2019-10-01_16-09-31

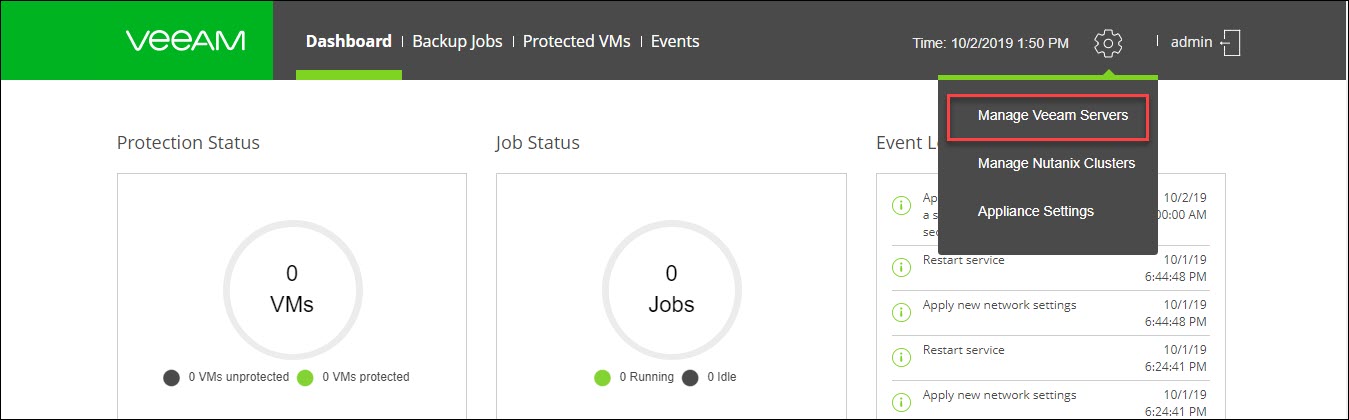
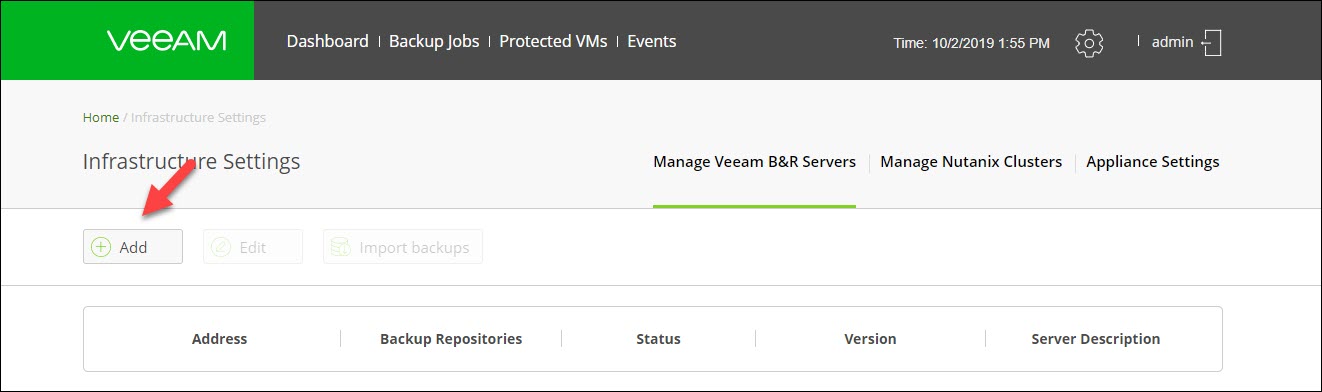
Step 5: Now let’s go add Veeam backup server to the proxy appliance infrastructure. Click the gear icon and select Manage Veeam Servers.

2019-10-02_10-48-54

Step 6Click Add.

2019-10-02_10-54-16

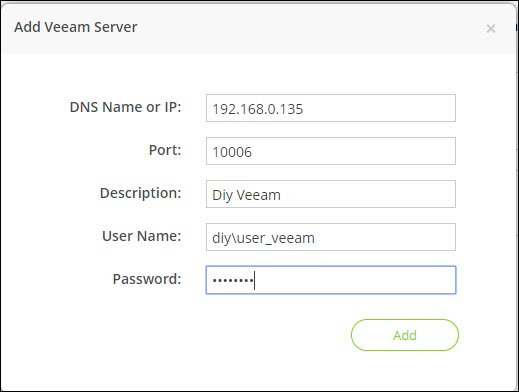
Step 7: Add the Veeam server details and Click Add.

2019-10-02_10-53-41

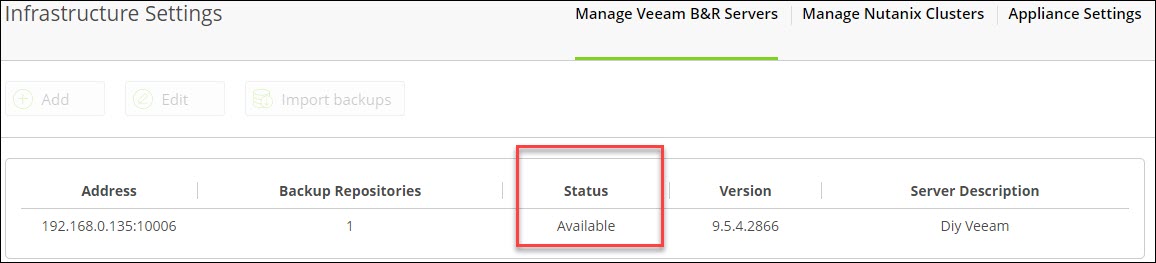
Now Veeam Backup and Replication server has been added successfully.

2019-10-02_10-56-04

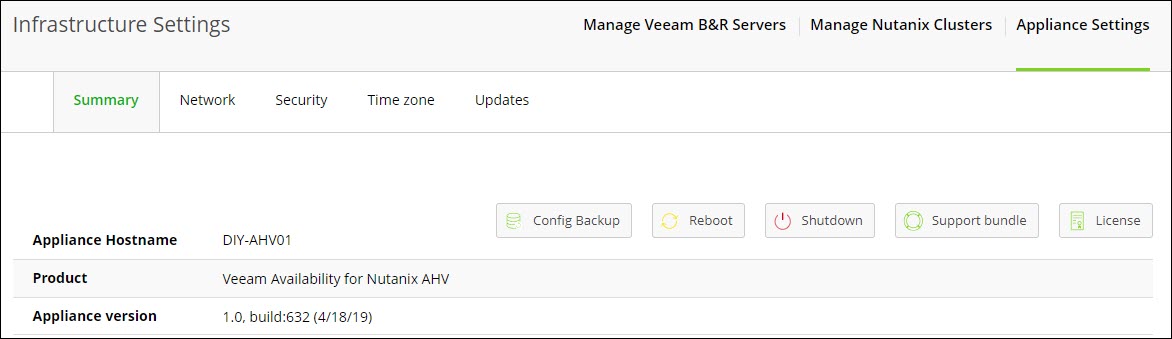
Step 8: To install the license to Veeam Availability for Nutanix AHV. Click the gear icon and select Appliance Settings.

2019-10-02_10-58-42

Step 9: Click License.

2019-10-02_10-58-42

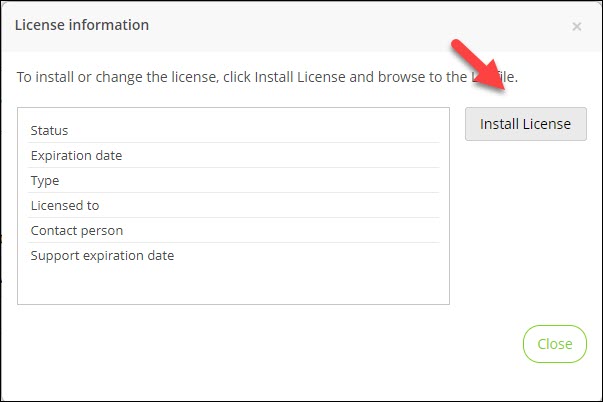
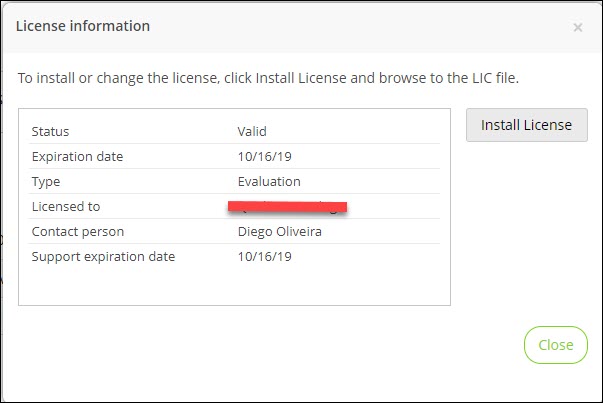
Step 10: Click Install License and Select the license file in the file browser and click open.

2019-10-02_11-00-46

Step 11: Click Close.

2019-10-02_11-02-42

Now that everything is configured, the next step is to create a backup job.

Part 1: Deploy Veeam Availability for Nutanix AHV
Part 2: Install Veeam Availability for Nutanix AHV
Part 3: Configuring Veeam Availability for Nutanix AHV
Part 4: Creating a backup job: Nutanix AHV With Veeam

One thought on “Configuring Veeam Availability for Nutanix AHV

Add yours

Leave a Reply

Fill in your details below or click an icon to log in:

WordPress.com Logo

You are commenting using your WordPress.com account. Log Out /  Change )

Facebook photo

You are commenting using your Facebook account. Log Out /  Change )

Connecting to %s

Create a website or blog at WordPress.com

Up ↑

%d bloggers like this: